Part 1. Why Make a Video with Pictures?
Turning pictures into videos doesn't require any specific reason. Still, if you want to make your videos more captivating or gain more views, likes, and shares, the following points can help spark your creativity:
Personal Use
If you want to bring old family photos to life, transform famous artworks like Girl with a Pearl Earring into animated versions, or run a social media platform dedicated to AI-generated videos, converting static images into engaging short videos can be incredibly rewarding. For instance, AI-generated videos of cats cooking have recently become a popular trend.
Business and Marketing
For businesses, creating a product promotional video used to be costly. With AI's image-to-video capabilities, you can easily animate product images to create dynamic showcases, recommendations, or before-and-after comparisons. Videos are far more effective than static images in building brand awareness, enhancing marketing impact, and boosting audience engagement.
Social Media Engagement
AI-generated videos are currently trending on social media platforms. They are highly popular among viewers, especially those with surprising or contrasting elements. For example, transforming two static figures into a hugging or kissing scene, turning objects into floating balloons, converting people into cartoon characters, or merging your favorite anime characters with your photos to create interactive short videos. Adding special effects to AI-generated clips can significantly increase their success on social media platforms.
Part 2. How to Make a Video with Pictures with AI
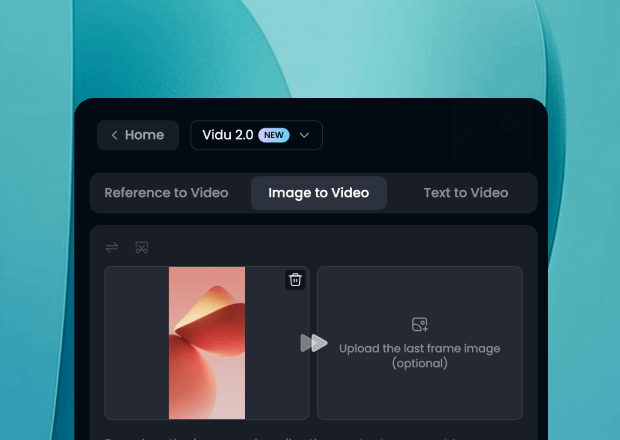
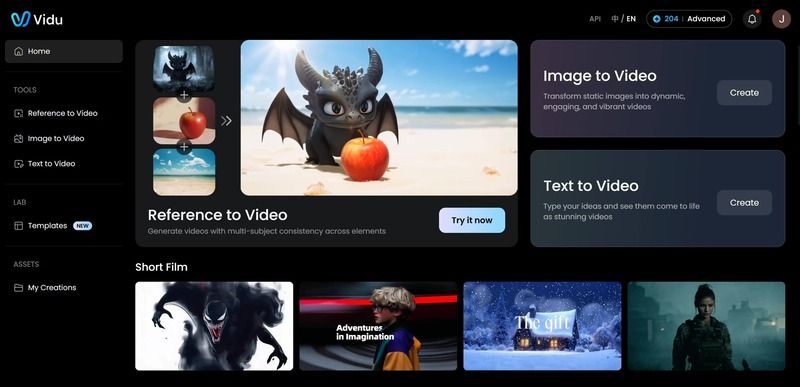
Vidu AI video generator offers two core features: Image to Video for creating videos from the first and last frames (the last frame is optional) and Reference to Video for generating videos based on reference images. After uploading a static image, Vidu transforms it into a dynamic, animated video. Users can also upload one or more reference images to guide the video generation process, ensuring the output aligns with the desired style and characteristics. Once you've registered an account on the Vidu AI website, follow the detailed steps below to get started with these features:
Method 1. Image to Video
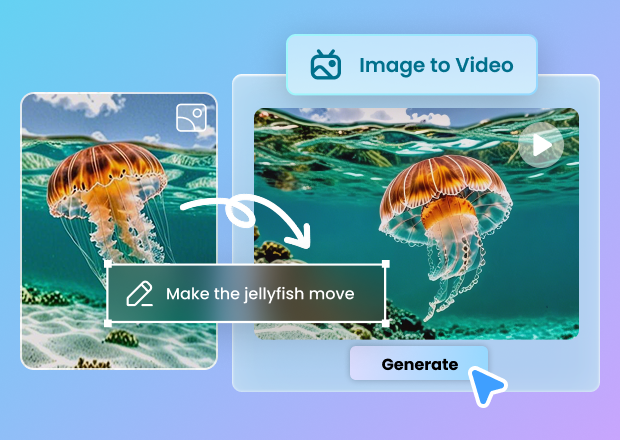
Step 1. Select the Image-to-Video feature and upload an image as the starting frame of your video. You can also optionally upload another image to define the last frame. Enter your text prompts to turn your images into a video.

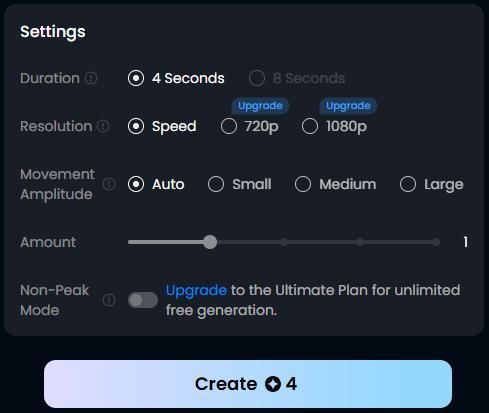
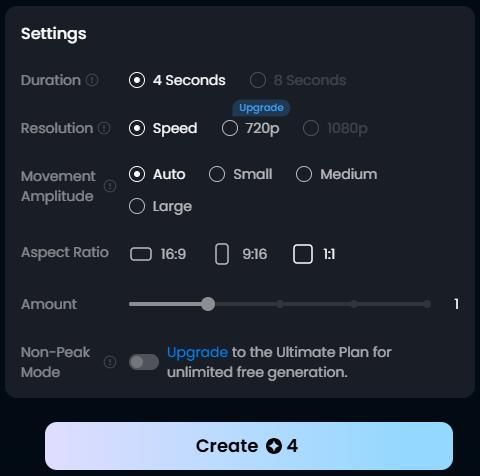
Step 2. Customize your video by selecting the duration (4 seconds or 8 seconds), resolution, movement amplitude, and other settings.
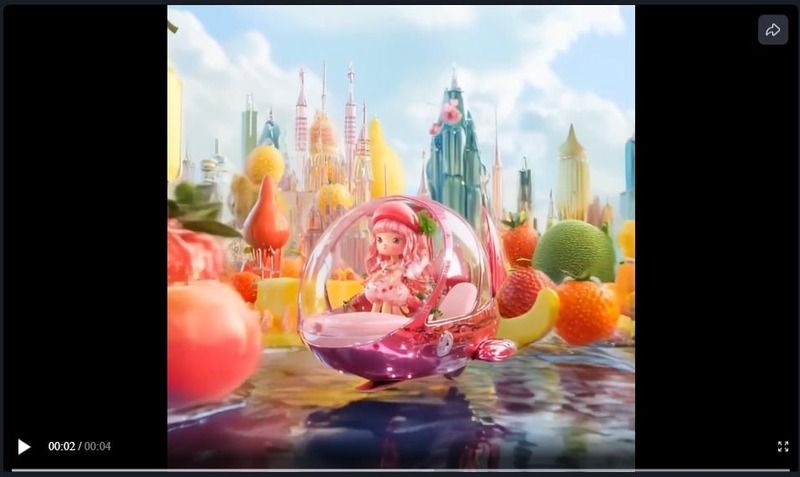
Step 3. Once the settings are complete, click the Create button. Wait for about a minute, and Vidu AI will automatically generate your video without additional editing.
Step 4. Preview the generated video. If you're not satisfied, you can regenerate it. Click the download button or copy the video link to share it.

Method 2. Reference to Video
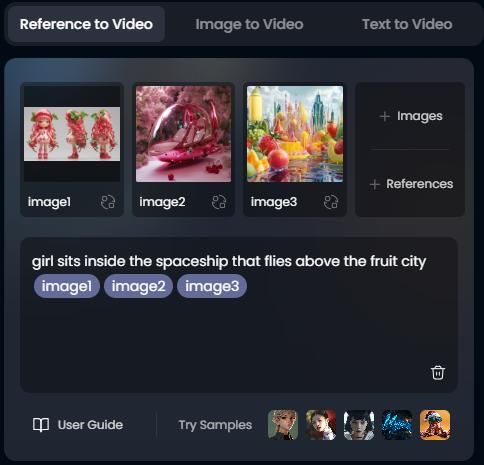
Step 1. Select the Reference-to-Video feature. Uploading multiple reference images of subjects, characters, or scenes is recommended. Add text prompts to guide the generation.
Step 2. In addition to the basic settings, you can choose the aspect ratio, such as horizontal (16:9), vertical (9:16), or square (1:1), to ensure compatibility with various social media platforms.
Step 3. Click the Create button to generate your video and preview the result. You can adjust the reference images or prompts if needed to ensure the footage matches your desired style.
Step 4. Once satisfied, click to download the video to your local device or copy the shareable link to showcase your creation to others.
Part 3. How to Turn Photos into a Video on Your Phone
Suppose you prefer to create videos directly on your phone. In that case, CapCut is a quick and easy way to turn photos into videos. It's simple, free, and packed with features that allow you to turn any photo into a professional-looking video in just a few taps. Here's how to do it:
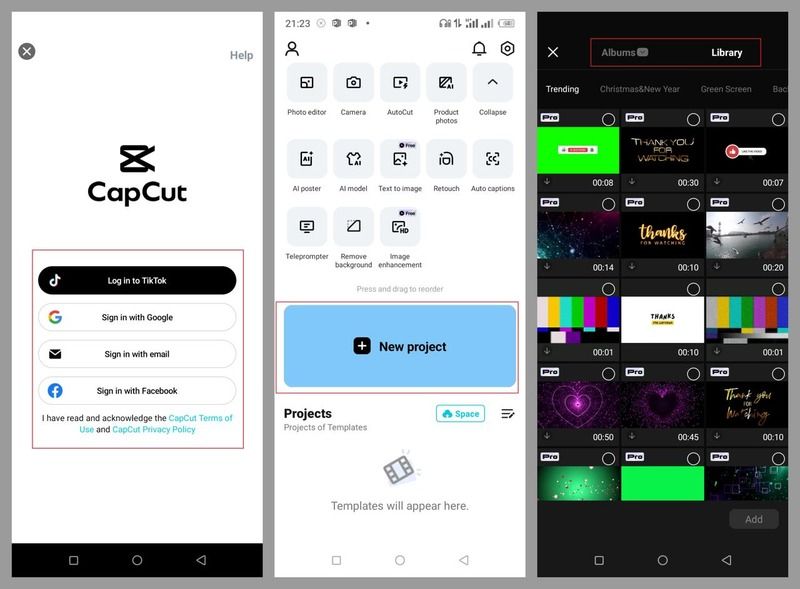
Step 1. Open CapCut and Create a New Project
If you can't install CapCut on your phone, download and install it from the App Store. Open the app and tap "New Project" to start.
Step 2. Arrange Photos and Adjust Duration
Import the desired photos from your phone's gallery and adjust their order. You can also use previous projects or templates.
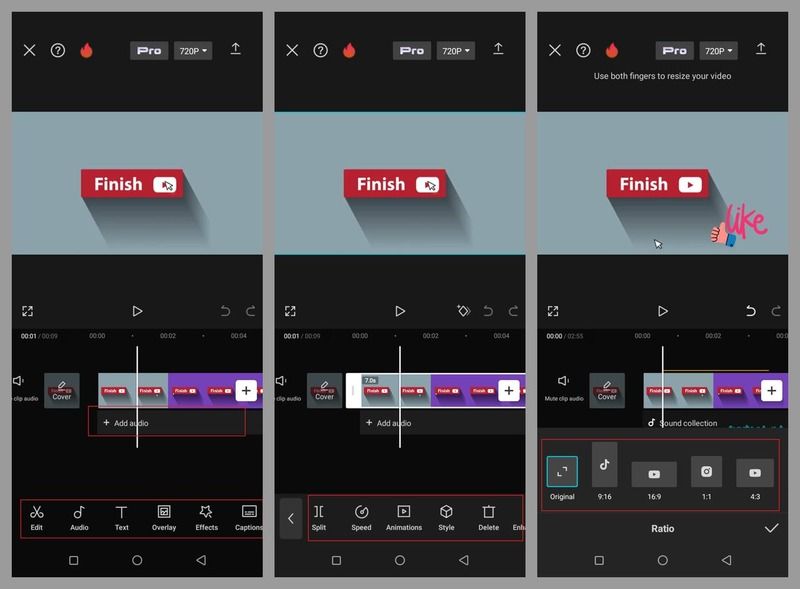
Step 3. Add Transitions and Effects
Adjust the video aspect ratio to fit various social media platforms. Enhance your video with background effects and transition styles to make it more polished and detailed.
Step 4. Insert Text and Subtitles
Add stylized text, subtitles, and background music to make your video more engaging and attractive.
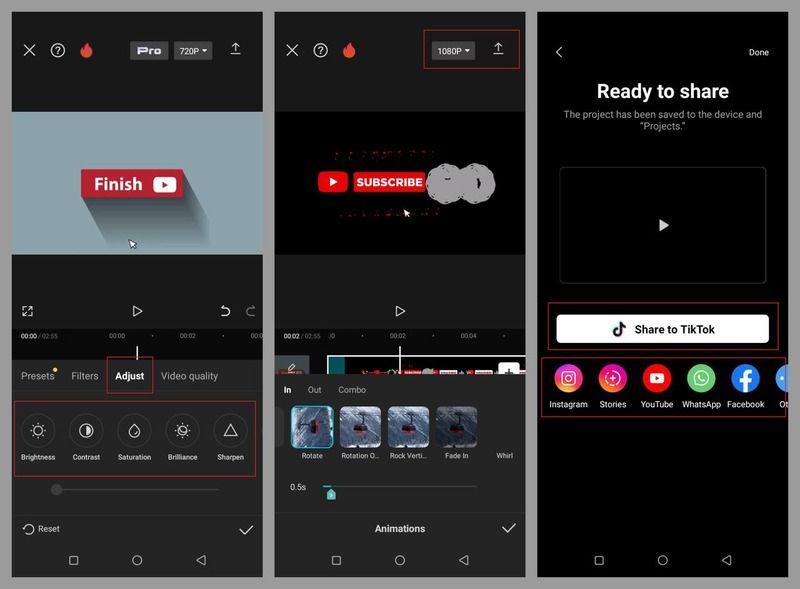
Step 5. Enhance Visuals
Apply filters like life scenery, movie, or retro to make your video visually appealing. Use various text styles, including AI-generated, trendy, and social, to captivate your audience.
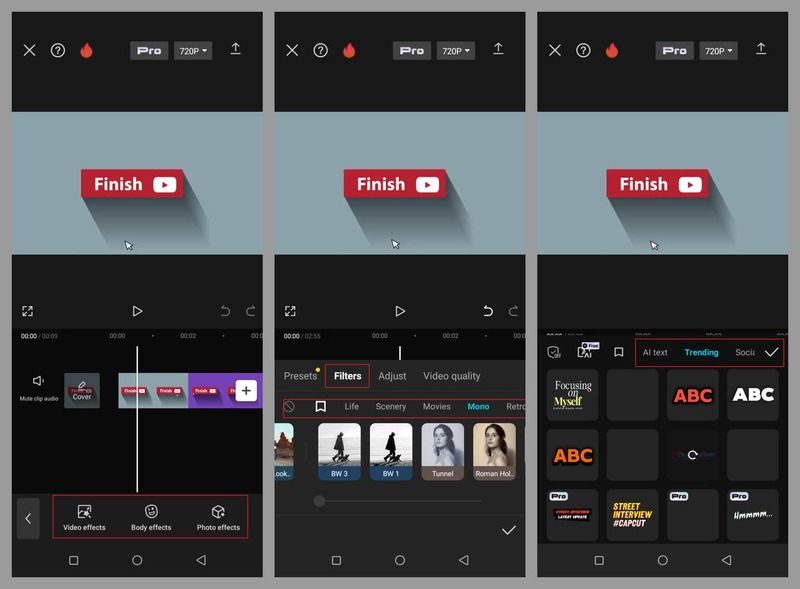
Step 6. Export and Share Your Video
Once satisfied with the final edits, export your video and share it on social media to gain more exposure and likes. CapCut supports detailed editing for a professional finish.
Part 4. Tips for Making Engaging Videos with Your Pictures
Using randomly selected photos may not be enough to achieve the best image-to-video results. Here are some tips to make your video stand out:
- Use High-Quality Images: Avoid blurry reference images, which negatively impact video quality and style. Always choose clear, high-resolution, and vivid images.
- Keep It Short and Sweet: For social media, shorter videos are more effective at capturing viewers' attention. Even an 8-second video generated by Vidu AI is enough to tell a complete story.
- Experiment with Transitions: Smooth transitions make your video look more professional and polished. Vidu AI automatically handles video fluidity, eliminating the need for advanced editing skills.
- Add Background Music: Incorporate background music that matches the mood of your video. Music sets the tone and evokes emotions, but avoid inappropriate tracks that could ruin the atmosphere.
Part 5. FAQs About How to Turn Pictures into Videos with AI
Q: How can AI help turn photos into videos?
A: Tools like Vidu AI offer Image-to-Video and Reference-to-Video features. Upload a starting frame (and optionally an ending frame), add text prompts, and AI automatically generates smooth animations with transitions and effects. Reference images can guide style, character, or scene continuity for more precise results.
Q: What is the Image-to-Video feature in Vidu AI?
A: This feature allows you to generate videos from a first and last frame. Customize video length, resolution, and movement amplitude. Vidu AI automatically animates the frames in between, creating a seamless short video without manual editing.
Q: What is the Reference-to-Video feature in Vidu AI?
A: Reference-to-Video lets you upload multiple images as references for subjects, characters, or scenes. Add prompts to guide generation, choose an aspect ratio for social media, and generate videos that match the style and characteristics of your references.
Q: How can I make my photo-to-video content more engaging?
A: Tips include:
- Use high-quality images for better clarity and animation.
- Keep videos short for social media (even 4–8 seconds can tell a story).
- Experiment with smooth transitions to enhance professional appearance.
- Add appropriate background music to evoke emotion and match the video’s mood.