Part 1. Set the theme and design characters
1-1 Why a rooftop battle?
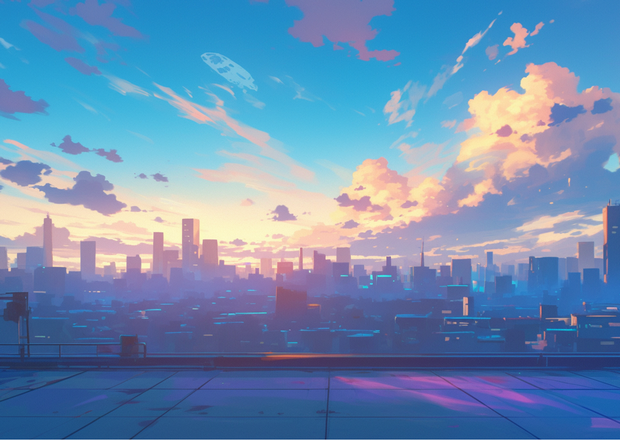
The setting is a rooftop adorned with glowing neon signs. There are three reasons for choosing this location:
1. It allows both horizontal and vertical movement
The added height variation brings dynamic action, keeping even 4-second clips visually engaging.
2. The background can be handled with a single image
A helipad floor and distant skyline—once these two elements are drawn, the camera movement won't feel unnatural. This means more reference slots can be dedicated to characters.
3. Lighting effects are easy to achieve
A nighttime cityscape with neon makes it simple to add rim lighting along the edges of characters' hair, which pairs beautifully with cel shading.
1-2 Character Design Sheet
Name | Age | Key Colors | Fixed Items | Silhouette |
|---|---|---|---|---|
Akari | 20 | Hair #C8A2FF + Star Emblem #FFD700 | Silver flight jacket, gold star on left chest | Slim, scar on one eyebrow |
Ryu | 22 | Hair #FF3030 + Sword #FFD700 | Black trench coat, sword with pulsing red LEDs | Inverted triangle body type |
Pixie | - | Core #00E0FF + Wings #FFFA00 | 30 cm spherical drone, 4 holographic wings | Sphere with wings |
I am often asked, "Is it okay to just give the color a similar name?", but if you write down the HEX code, it seems that the color fluctuations in Midjourney are greatly reduced. Roughly speaking, it's like "specifying the paint number and giving it to them."
Part 2. Creating references with Midjourney Niji 6
Niji 6 is an anime-specialized model known for its clean line art and vibrant colors. While v7.0 is also excellent, its prompt handling can be trickier, so for this tutorial, we'll use Niji 6.
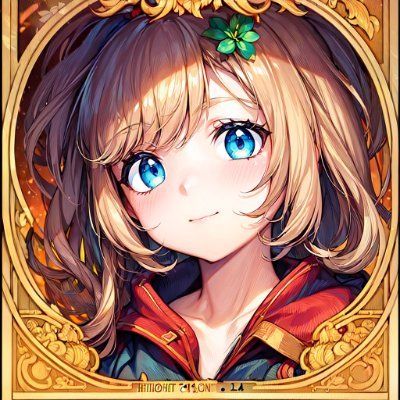
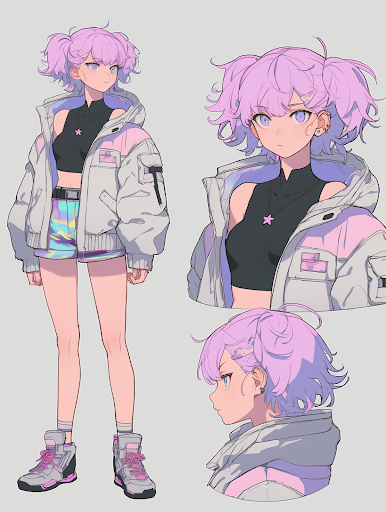
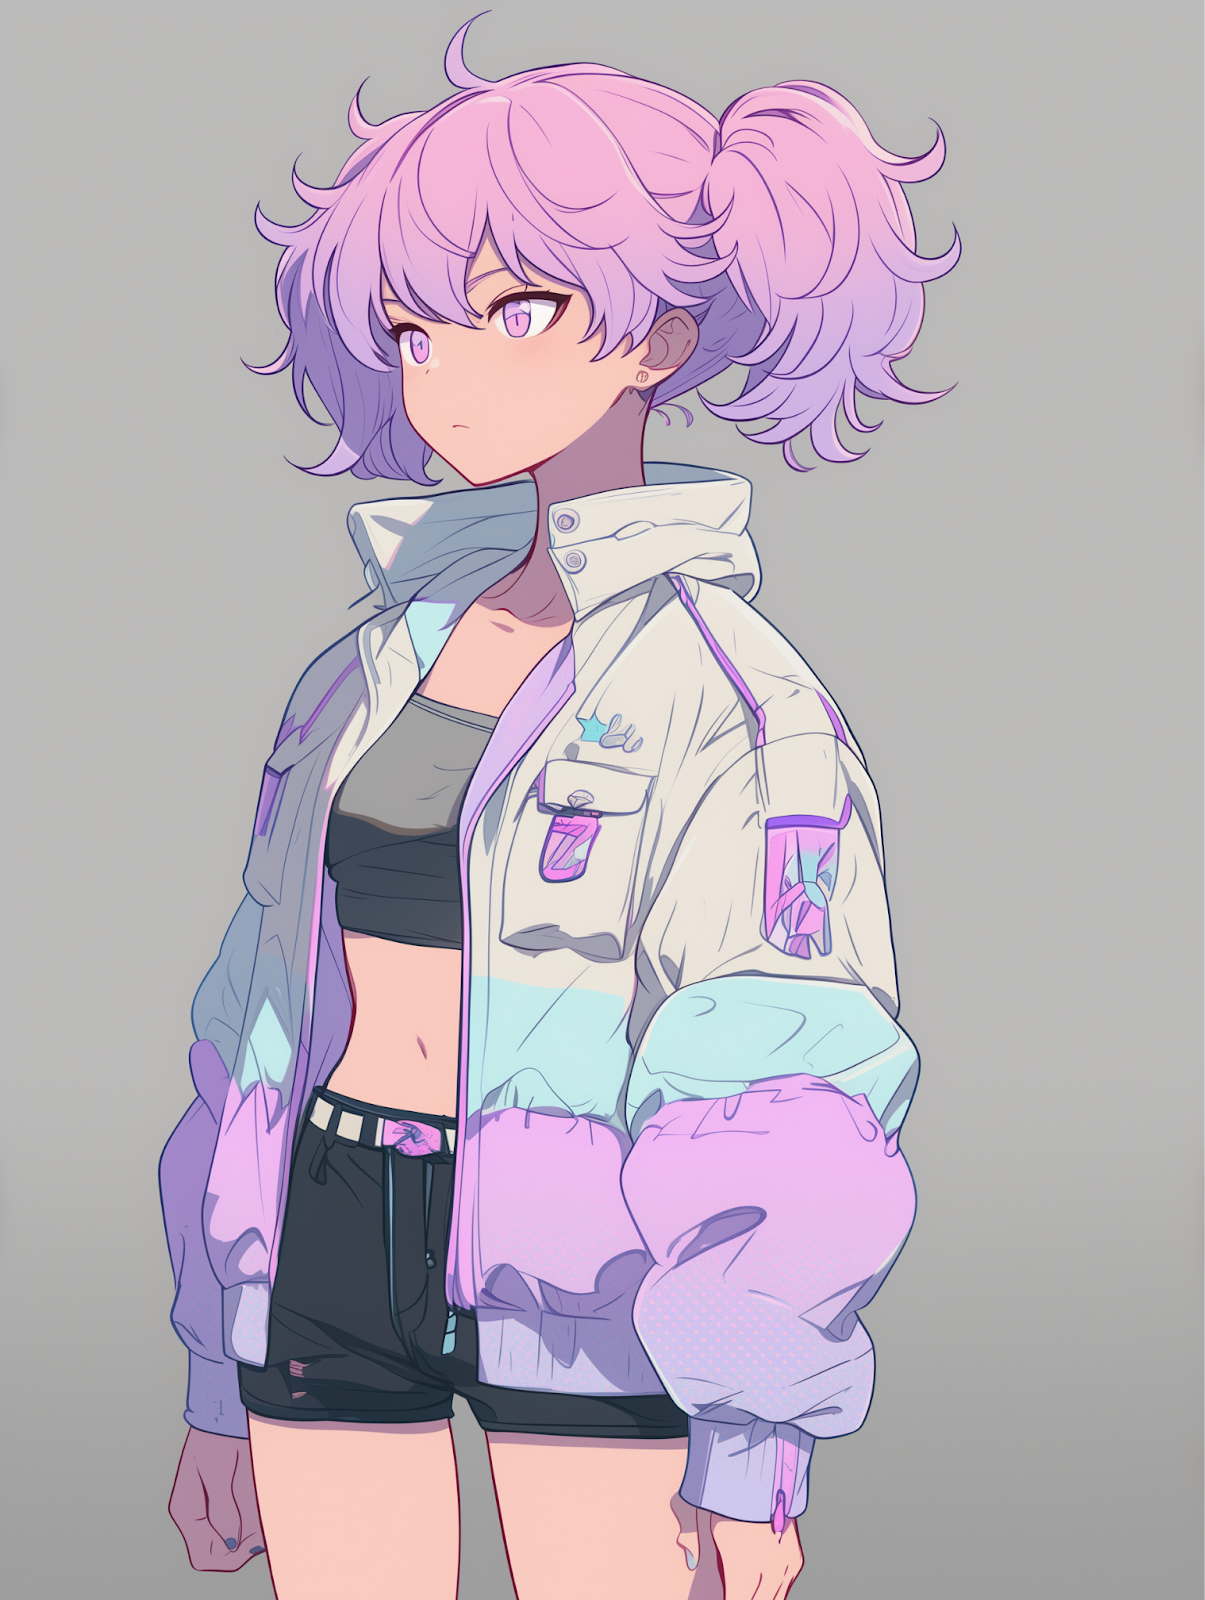
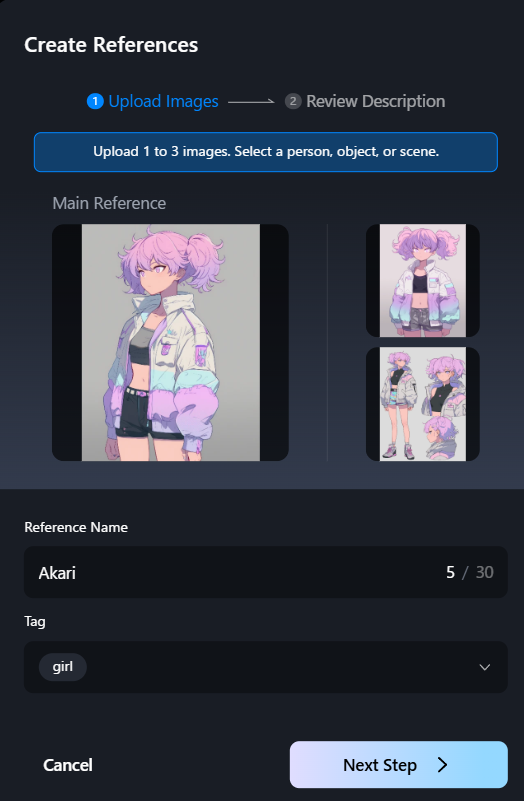
2-1 Akari (Three-View Reference)
Prompt: imagine PG-13 character reference, young adult woman (age 20) cyber-punk heroine,
front view centered, modern TV-anime style, thin colored line art, variable outline,
two-tone cel shading, short lavender hair with magenta streaks, silver flight jacket with gold star patch,
neutral grey background --ar 3:4 --stylize 150 --niji 6 --seed 777
- BAN Warning: Initially, using terms like "girl, crop top" triggered an automatic ban for "sexualized depiction of a minor."
- Workaround: Declaring the character as a young adult and changing clothing to a fitted tee allowed the prompt to go through safely.
Although the goal was to generate a front view, a full three-view reference was output. This image will be used to generate further poses.
Midjourney operates on Discord. Right-click the output image and select “Copy Link” to proceed with further use.
2-2 Akari (Left Profile)
By inserting the previously copied image link into <Akari_front_URL>, you can generate a consistent character design and art style across different views.
Prompt: imagine profile left view, facing right, modern TV anime style, colored thin line art, two-tone cel shading, soft pastel palette, shallow depth of field, neutral grey BG, modest clothing, PG-13 --cref <Akari_front_URL> --sref <Akari_front_URL> --ar 3:4 --stylize 150 --niji 6
- Cref (Character Reference): Maintains facial features and character form.
Sref (Style Reference): Maintains overall art style and visual tone (e.g., oil painting, manga style, etc.).
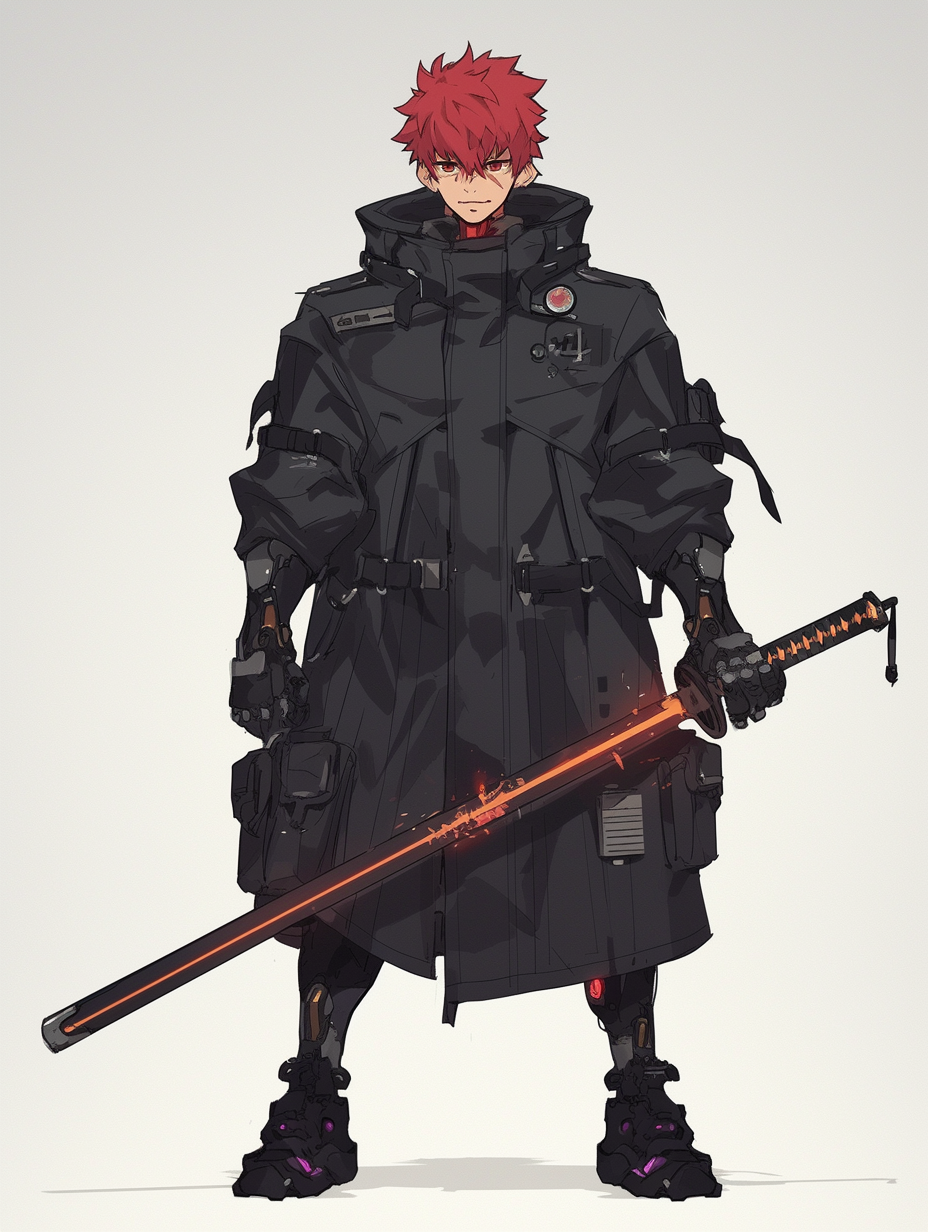
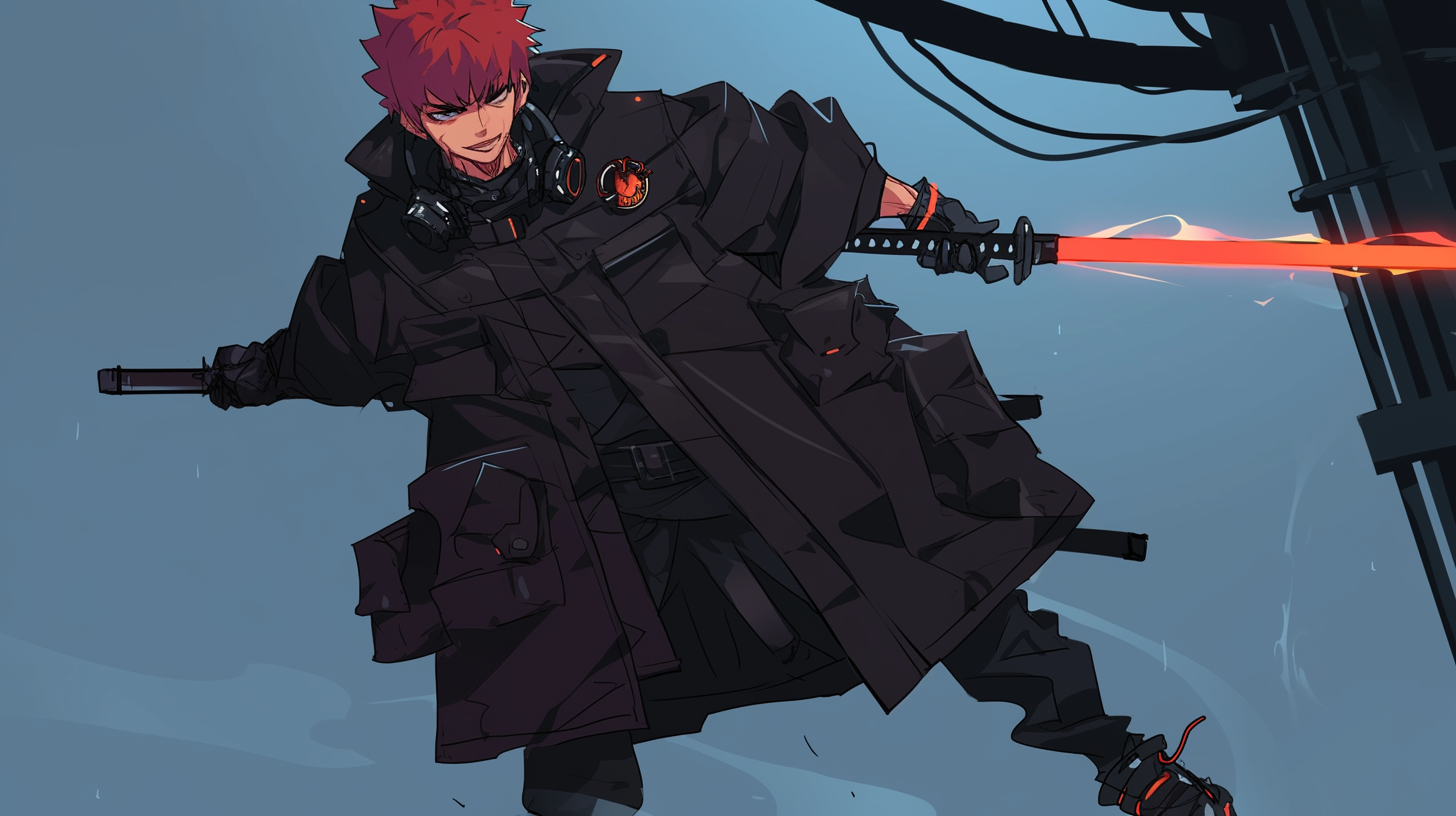
2-3 Ryu (Front Base Pose)
Prompt: imagine PG-13 character reference, young adult man (age 22) cyber-samurai, front view, modern TV anime style, colored thin line art, two-tone cel shading, short crimson hair, black tech trench coat, glowing gold katana held down, neutral grey studio BG, symmetrical stance --ar 3:4 --stylize 150 --niji 6 --seed 888
This prompt generates a symmetrical front-facing base image of Ryu in a cyber-samurai style, featuring clear anime-style line art, bold cel shading, and a neutral background suitable for character reference use.
2-4 Ryu (Action Pose)
Prompt: imagine aerial downward slash pose, coat fluttering, red energy trails, cinematic dusk rooftop, anime style, variable-width outline, two-tone cel shading, gentle bloom, PG-13 --cref <Ryu_front_URL> --sref <Ryu_front_URL> --ar 16:9 --stylize 200 --niji 6
This prompt generates an action scene of Ryu in mid-air performing a downward slash. His coat flows dramatically with red energy trails against a cinematic dusk rooftop background. By using both --cref and --sref, the character design and visual style remain consistent with the base reference image.
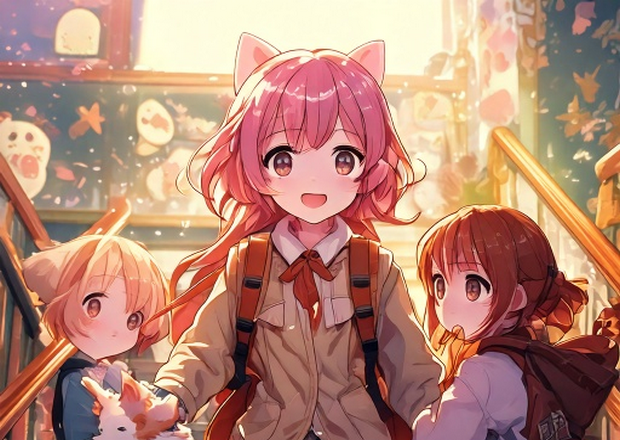
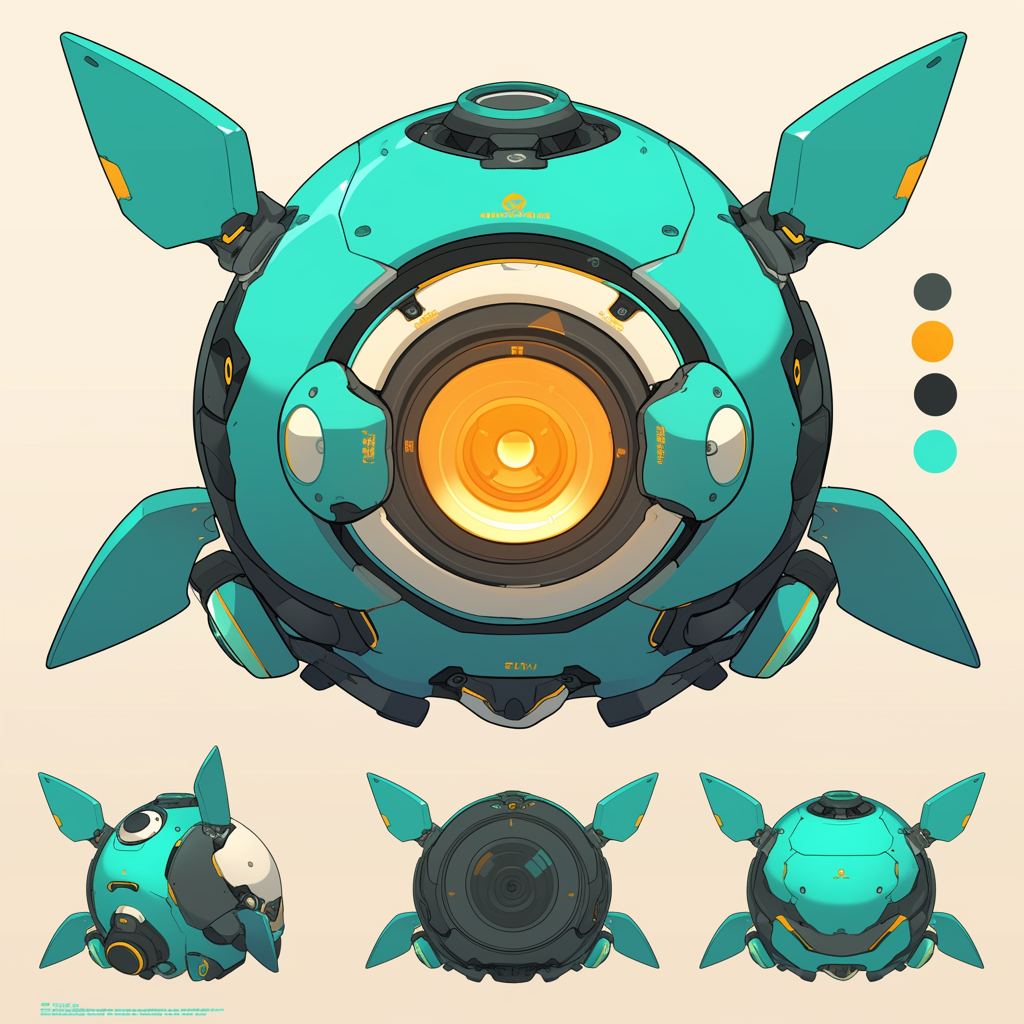
2-5 Pixie (Three-View Reference)
Prompt:imagine orthographic reference sheet, hovering spherical drone mascot, diameter 30 cm, teal alloy body, central camera lens, four holographic wings emitting soft yellow light, modern anime cel shading, colored thin line art, neutral grey studio BG --ar 1:1 --stylize 120 --niji 6
This prompt generates a three-view (orthographic) reference sheet of Pixie, a 30 cm-wide floating spherical drone mascot. It features a teal alloy body, central camera lens, and four soft yellow holographic wings, all rendered in clean anime-style cel shading with thin colored lines. Ideal for use in consistent character modeling and animation generation planning.
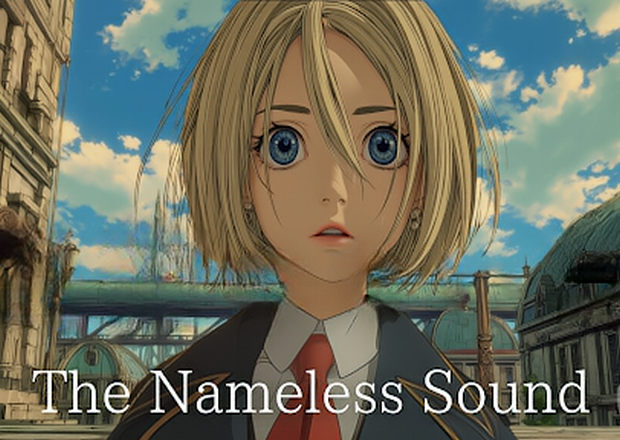
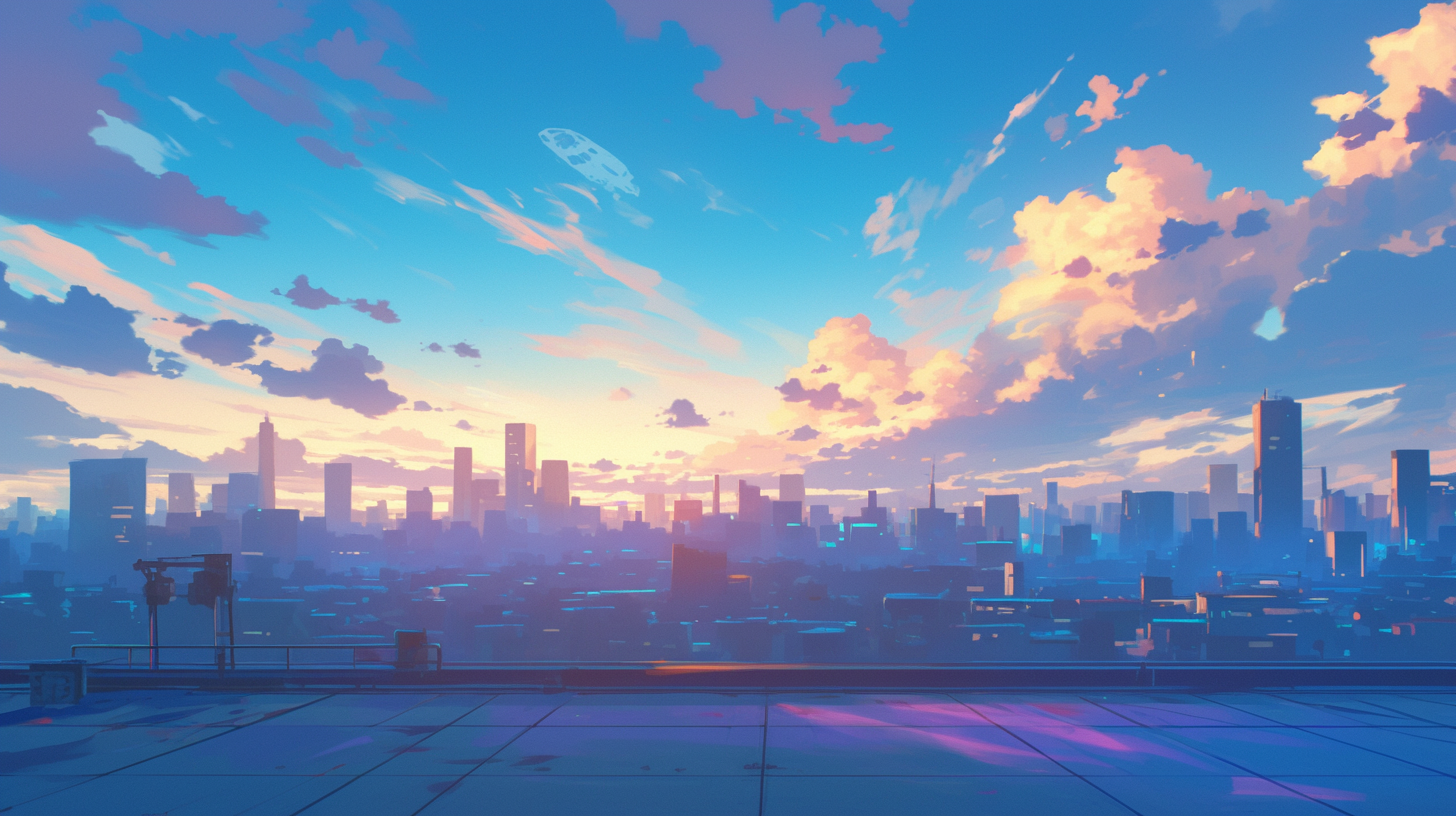
2-6 Background (16:9)
Prompt: imagine cinematic rooftop helipad at dusk, neon-lit skyline, soft fog layers,
2.5D anime background, thin colored line art, two-tone cel shading,
no characters --ar 16:9 --stylize 250 --niji 6 --seed 12345
Note: Including no characters is essential. If omitted, random passersby may appear in the scene, which can confuse the Multi-Reference system and compromise character consistency.
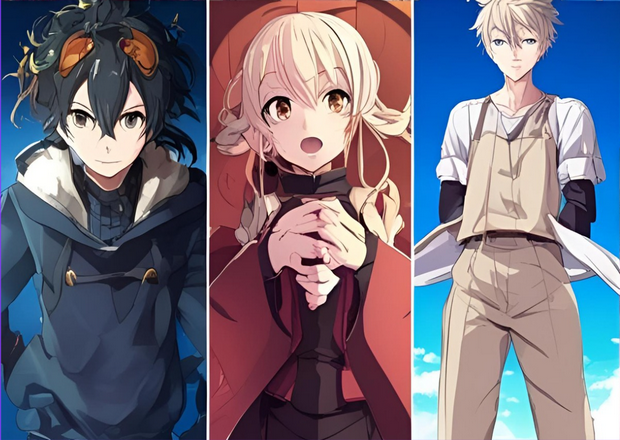
2-7 4 Directions + Actions
Add multiple images for each: Akari, Ryu, and Pixie, such as "left profile," "back view," "running (or cutting/rotation)," etc. By using --cref <Akari_front_URL> to refer to the base image and explicitly stating "hair remains lavender," color discrepancies will be minimized.
The basic front view + 2 auxiliary views (side and back) make up one set, and Vidu AI video generator allows you to upload a maximum of 3 images at the same time. For running poses, generating with a 16:9 aspect ratio will prevent "limb clipping."
After generating the images, download them and organize the file names like this:
Akari_front.png
Akari_profile.png
Ryu_front.png
…
BG_rooftop.png
This will make tagging in Vidu easier.
Part 3. Create A 4-Second Clips in Vidu
3-1 Basic Settings in Vidu
- Mode: Reference to Video
- Clip Duration: 4 Seconds
- Resolution: Speed or 720p
If you select "Speed" for the resolution, you can click the HD button in the top right of the thumbnail after generation to upscale to 1080p.

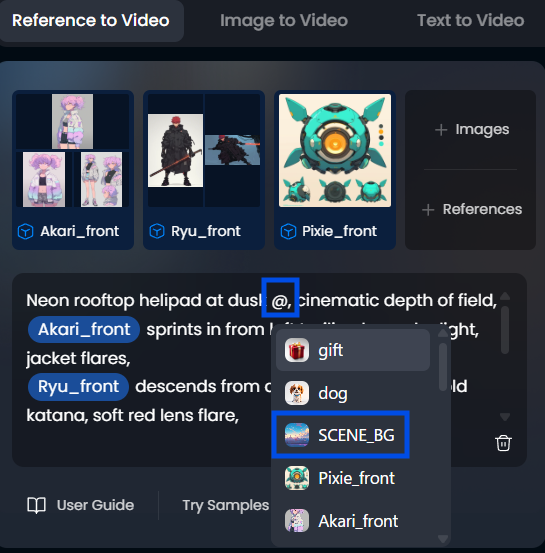
3-2 How to add My References
1. You can register up to three images at once using the My References button.
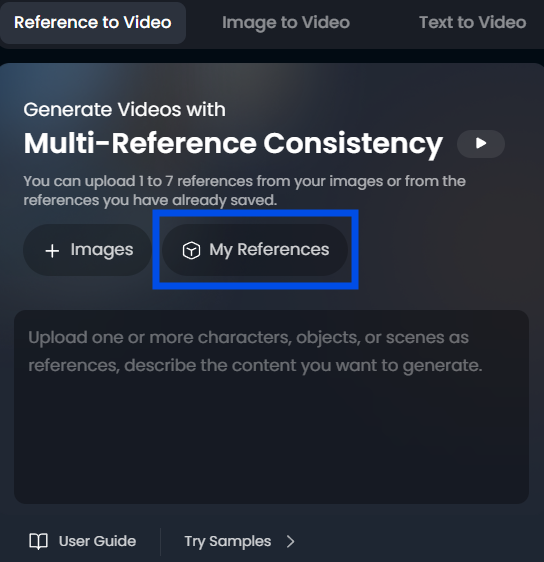
2. The order in which they are added will automatically determine the reference order, so place the most important front core at the top.
3. Set the Reference Name.
Enter a name that is easy to distinguish, such as the character name or pose name.
```
@SCENE_BG
@Akari_front
@Ryu_front
@Pixie_front
@Akari_sheet ... (auxiliary)
@Ryu_sheet ... same
```
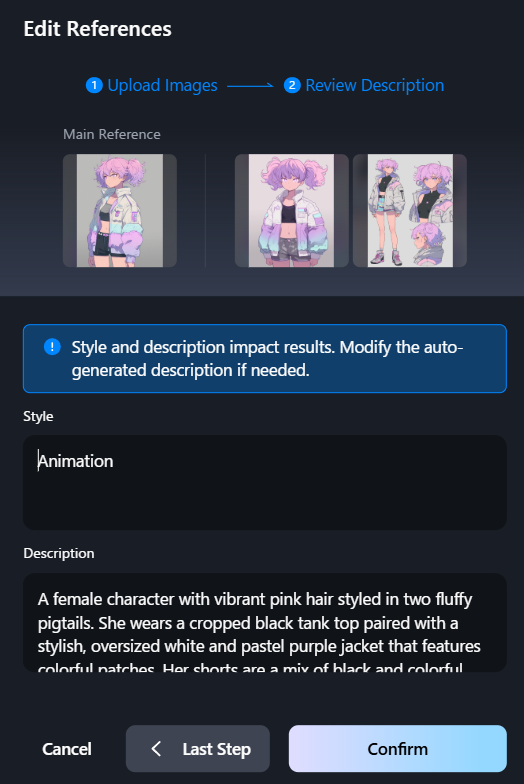
4. Check the Style.
If you want to add more depth, try changing it to 3D Rendering or 2.5D Animation.
3-3 List of 8 Prompts
# C1 0-4s: Introduction
@SCENE_BG drone rise, neon skyline dusk, gentle bloom, PG-13
# C2 4-8s: Akari Running
@SCENE_BG @Akari_front @Akari_profile enters left sprinting, lavender trail, dolly-in, rim light
# C3 8-12s: Ryu Landing
@SCENE_BG @Ryu_front descends from the sky, gold katana sparks, tilt-down, dust puff
# C4 12-16s: Pixie Joins
@SCENE_BG @Pixie_front hovers center, teal holo-wings pulse, zoom-in 120→80 mm
# C5 16-20s: Confrontation
@SCENE_BG @Akari_front @Ryu_front face-off, jackets flutter, static 50 mm lens
# C6 20-24s: Slow-Motion Dramatic Shot
@SCENE_BG slow-motion 0.5×, lavender vs gold energy arcs, handheld 3%
# C7 24-28s: Collision
@SCENE_BG impact shockwave, cyan-magenta grade, handheld 5%, debris particles
# C8 28-32s: Pull-Back End
@SCENE_BG camera pulls back, sunset sky fills frame, silhouettes, gentle bloom
✱ Quick Explanation of Camera Terms
- dolly-in: An image where the camera zooms forward on rails.
- tilt-down: The camera tilts downward.
- handheld 3%: Slight camera shake to add realism.
When typing in the prompt input field, entering @ will automatically display reference suggestions.
3-4 Design Concept of Movement and Camerawork
1. Horizontal movement + vertical movement + rotation are switched every 4 seconds to add contrast.
2. If you write the camera lens value as a "guideline for distance," Vidu reproduces the perspective surprisingly faithfully.
3. Slow motion is entered at "0.5x." The reason is that the image quality will decrease if you add length in post-editing, so it will be smoother if you set it to slow motion on Vidu from the beginning.
Part 4. Sound effects and BGM - Vidu AI Sound Effects × Suno AI
4-1. What is Vidu AI Sound Effects?
A new feature added by Vidu in April 2025 is a tool that generates sound effects just by entering text and a timestamp. If you write something like "0-2 s: wind" or "2-4 s: sword clash," it will create a multi-layer according to the number of seconds.
AI Sound Effects Quick Start Guide- Vidu's AI Sound Effects use the format [0-1s]: wind whoosh for time-based instructions in seconds.
Example: C7 Collision SE
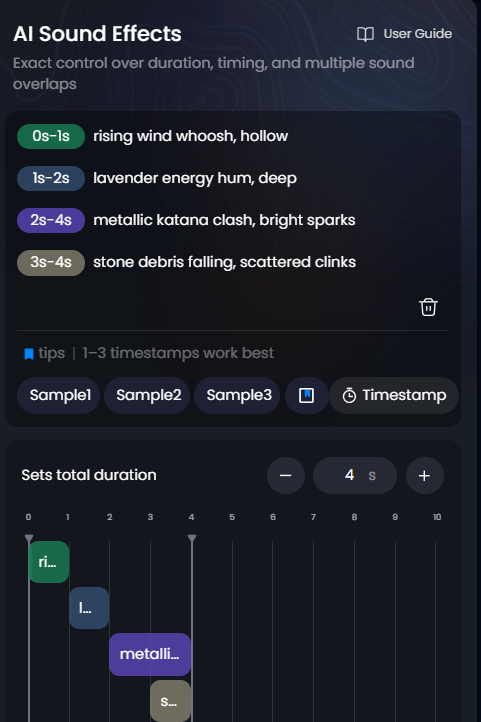
Click the Timestamp button before entering the text. You can adjust the length of the sound effect on the Sets total duration screen at the bottom.
https://www.vidu.com/share/2752563312369487/807534In the past, we would search through sound effect websites and manually match waveforms, but with this feature, you can complete a clip in just a few seconds.
4-2 BGM with Suno AI
Suno AI is a music generation service that creates 2-3 minute songs from just text input.
While a detailed explanation is omitted, you can generate background music by turning on "Instrumental" in the Suno AI Create screen and simply entering text for the "Style."
Style Example
Japanese anime rock, uplifting Instruments: cinematic synthwave, pulsing bass arpeggio, punchy electronic drums
https://suno.com/song/48c1d3e0-3c4a-40f1-b29a-6910af0553e5?sh=3kMOrCZFOaSiQhbR

90% of the sound is completed using Vidu's in-house sound effects and Suno AI music. The remaining 10% is spiced up with EQ and limiters in Filmora and Resolve, and a 30-second animation can be completed without any rework.
Part 5. FAQ and Real-Life Failure Stories
1. Hair color changes midway
- Issue: Only the front view image was registered as a reference.
- Solution: Register both front and side views, and place the front image at the top of the tag order (Vidu prioritizes based on tag order).
2. Face appears in a back shot
- Issue: Forgot to write "face not visible" in the back view prompt.
- Solution: Add "face hidden, back view, no facial details" to the back view prompt.
3. Camera speed jumps at the 4-second boundary
- Issue: Missing camera verb for each clip.
- Solution: Ensure that every clip includes specific verbs like "dolly-in" or "tilt-down."